Tampilkan postingan dengan label option mode. Tampilkan semua postingan

Using a Light Meter

For many persons, making use of the light meter built-in their digital photographic camera models is suitable enough. On the other hand should you desire to take your digital photography knowledge to a new level, you may need to take into consideration using a light meter that is hand-held.
You will come across two types of metering:
- The first kind is reflective metering. The actual meter within your digital camera is basically reflective metering. It calculates the quantity of light that will bounce off of from your subject into your digital camera lens. Your digital camera makes use of this info to find out variables such as the aperture, ISO and shutter speed if it is fixed on auto-mode.
- The 2nd kind of metering is known as incident metering. Hand-held light meters are generally incident meters. The incident meters calculate the light shimmering on the subject. Simply because they are not relying on the reflective attributes of light to provide you with a reading, they are far more precise when compared with your camera interior meter. The dome that comes in reflective meter contains sensitive sensor that calculates the light entering it from all possible angles.

Read More......

Tricks and Tips to shoot Green Screen

You can add beauty and glamour to your photographs with chromakey green muslin backdrops.  Green screen backdrops are important photography equipments which can add to the collection of your photo studio. You can take amazing pictures with the use of these green screen muslin backdrops by following some simple tricks and tips...

Buy a high quality backdrop
    * Make sure that the chromakey green muslin backdrop used by you is made of high quality fabric. 
    * For good quality pictures, the backdrops must be made of durable muslin material and must be 100% cotton to absorb light.
    * The backdrops must be seamless and flawless to avoid any wrinkles in the photographs.
    * Buy a backdrop which is easy to fold and carry so that it can be used for on locations shoots as well.

Fix the backdrops properly
    * Make sure that the green screen backdrops are fixed properly to avoid any folds in the photographs.
    * The backdrop must be fixed at a place where lighting is proper. Lack of proper lighting can affect the quality of the images by leaving shadows in the images taken.

Use good quality software
    * Use good quality chromakey software to edit the photos taken against the green screen backdrop.
    * The software will help in eliminating the green screen properly from the photographs and you can add the images of your choice to make the pictures look beautiful.

Read More......

Food Photography

Lighting

When lighting food we want to avoid harsh shadows and highlights. To do this use a soft, diffused light source. A shaded area with reflected natural light can work well. For artificial light, try lights reflected from large umbrellas, or large softboxes.

Don't light your subject directly from the front, as the light will fill in all the shadows, giving a flat image with no texture. Instead light from the side to bring out the texture and details in the food.
 
Angle

Read More......

Important Pointers for The Contest

Be honest with yourself; take a good look at your photography, even if you have just one good picture think critically if it is ready for the contest.

Here are important pointers:

1. The theme is important.

 Make sure your photograph or series of photographs fit well into the topic of the contest, this is one of the most important factor, your image can be great, beautiful, technically correct but if this is a portrait and you submit it to landscape photo contest you will not get any recognition.

2. Again topic it important.

I know you will not submit portrait to landscape contest but i want you to understand that this is very important. Some contest have 10 or more categories go through it and understand what will the judges look for and what category does your work fit best.


3. Follow the rules.

Read More......

Canon EF 50mm lens is lightweight


People like a variety of things, specifically when it comes to their camera, along with its lens. Although everyone doesn't need a standard zoom lens, many individuals would like to have a fixed focal length lens. Continue reading to learn more about the Canon EF 50mm lens, a top choice when it comes to lenses for cameras. The Canon EF 50mm lens is lightweight, inexpensive and has a fast f/1.8 aperture. Individuals who are looking for a zoom lens with a fixed focal length will appreciate the quality of this lens. With a weight of only 4.6 ounces, this EF lens is Canon's lightest, but it gives a sharp performance because of its classic Gauss-type optical design. Because of this, the lens creates images that bear resemblance to how the eyes see an object. If you want natural depth for images or portraits, this lens is superior. It is possible to take extreme close-ups, as this lens will focus as close as 18 inches. This standard zoom lens balances color wonderfully and has a one-year warranty from Canon. Almost all customers have been pleased with this standard zoom lens, with some very positive reviews and some that were not as good. This appears to vary with what the buyer expected from the zoom lens. In some instances, the customer expected more after browsing the reason of the lens. Other products which exaggerate what their product is able to do, are deserving of having unhappy customers. This lens generally seems to do what it says for many people. Several customers were not satisfied that the housing was totally made of plastic materials.

Read More......

Macro lenses


If you are interested in doing really close up photography, or macro photography, of things like beautiful flowers, interesting insects or any other object that you want to get extremely close to, you will need the assistance of a macro lens. These lenses are extremely specialized and designed only for very close up photography. These types of lenses are often used for marketing, nature shots, science shots as well as medical photography. Most of the macro lenses will have a 1-1 framing ration, this means, that everything that is the frame is its actual size. The most common subjects found in these kinds of shots are generally creatures or some sort of objects that are very visually interesting or intriguing and are usually overlooked if viewing them with the naked eye. Using this kind of lens will take practice but, if you try to follow the few rules listed below, it should help you develop your own technique. You should choose a macro lens that is going to fit your personal photography needs. Just like any lens, the macro lens comes in a variety of different focal lengths. Those lenses that are 50 mm and 60 mm with fixed focal lengths will capture much wider angles than those that are 100 mm or 300 mm. If you are in need of highly controlled situations like a food item or product photography then a wide macro lens is going to do the job. The longer macro lenses are far better for the less controlled shots where you need to keep some distance.

Read More......

Quality Panorama Photo Shooting Tricks !


Quality Panorama Photo Shooting Tricks
  • 1. You should start by planning your shot sequence, because when you are shooting pictures for panorama, you will be taking ten or more pictures in a sequence. It is best to do a dry run looking through the viewfinder to plan the entire sequence in advance on the way you will arrange your shots.
  • 2. Though you can shoot photo sequence in any direction, but it is best if you can shoot from left to right, as it becomes much easier to make sense with your shots when you are viewing them on your computer, and you will get them in best order in the software.
  • 3. In panoramic photography, your photos should overlap to enable software to stitch them perfectly. You can very easily stitch your photographs with a twenty percent overlap or even less. Having said that, thirty to fifty percent overlap is recommended. A large overlap in panoramic photography delivers you a adequate room for fine-tuning your final results.
  • 4. For enhancing the vertical field of view by about fifty percent, you should turn your digital camera sideways for shooting your photos in portrait position. You will have to shoot more frames for covering the same scene, but with this maneuver, you will get significant vertical coverage.

Read More......

Beginner Street Photography

Beginner Street Photography 
 
Street photography is the ideal way to express your creativity while perfecting your photographic technique. The shots you create can weave together a vibrant story of a neighbourhood or a local community, while challenging your photography and supporting you to develop an artistic style.

The first of the street photography tips is to determine your plan in capturing images. Are you looking to simply strap a camera around your neck and look at an area through a photo-journalistic tactic, or do you prefer to talk and interview someone and create a portrait?

Photojournalism takes an approach were the photographer is standing back to capture moments happening without interfering or posing their subjects. If a shot is missed, there is no way to recreate it; as a substitute you look ahead to the next opportunity.

A more personal side to urban photography is to focus on the individuals on the street, find their story and capture an intimate image that reflects their personality. That person may be a businessman, someone who is homeless, or even a priest who is handing out his literature on a street corner. The photograph of that person that you take then becomes part of a larger narrative that weaves through your images.

Read More......

Night and twilight photography


night and twilight photography
It's necessary to be patient, then we can get really great images. Your technical skills will play an important role at night.
At night you work with long exposure time, which requires the use of a tripod and a shutter-release cable. 

You should set the lowest ISO value, for example ISO 100 or ISO 200. Exposure time around 1-10 seconds is a good time for this kind of photography. Your camera will register movements in a very special way, differently then your eye. The effects are really fascinating: moving lights and reflections create a new reality. The spotlights in movement make interesting patterns, moving cars are not visible in the picture, only their light traces.

If you normally use any filters on your lens, better remove them at night. If it's windy it may be difficult to keep the camera steady on your tripod. Then you can hang some weight or collapse the tripod legs to their minimum height.

Read More......

Photographing Christmas Lights

Photographing Christmas Lights

Christmas lights, with all those incredible glowing decorations, just beg to be photographed, but usually they come out as colored pinpricks or a jagged blur of out-of-focus chunks of light. There are some easy things to fix all that.
 
The first thing you need is something to steady your camera on. A tripod is best, or gorilla pod. You can use a small beanbag or, in a pinch, set the camera on something solid. You will be working with longer exposures than you can hold without blurring.
 
For outdoor shots, the time of day is critical. Just around dusk or just before sunrise. By having some ambient light you can fill in the unlit areas of the trees and homes but still have the glowing light dominate.
 
Set your ISO speed to 400 or 800. If you go much higher you might start to get some grain or digital noise. You should test this; you will see the issue appear first in the shadow areas. Some of the newer cameras can go to higher ISOs, so do some testing.

Read More......

Black and White Photography

Black and White Photography
1.Find a location.
It can takes for months to find a great location, i go back to the same location many times before I get lucky to encounter great light and everything connects perfectly. Sometimes it just happens and you will be able to walk into a great place where light , contrast and composition are perfect, most of the times you will have to go back, even in you are experienced photographer you will go back to the same location to improve the landscape you see.
 
2.Specific point of view.
Finding location is first step, you have to find specific point from where you will be taking your image. This is much more complicated then just pointing the camera and hoping for the best. The specific point of view is critical for your composition. It i this one and only point where your camera will be set before you press the button, this is the point from where all the elements are place in right position, where all the shapes and forms of threes, mountains, lakes, ocean, rocks  are connected. It is very hard to find this point and you have to learn and practice before you will be able to find it fast and effective. but remember landscape photography is not about fast and rushing, if you think you like the pressure and rushing you should go into journalism or documentary photography.

Read More......

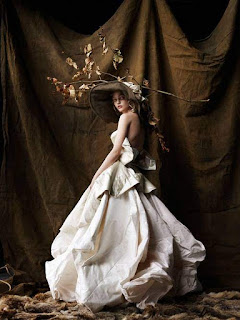
Fashion Photography

Wedding photography is different from other types of photography. One needs to keep on many factors while shooting wedding photos. Wedding is the most memorable day for anyone life and to make it more memorable and crucial it is in the hands of photographer who are capturing those pictures. First of all one should keep in mind that everyone wants to look pretty and beautiful in wedding pictures thus good lighting help you to take more beautiful pictures. Lighting plays very important role in wedding photography. Thus, lighting has to appropriate at the time of capturing a photo for wedding.
Next vital thing which you keep in mind is about your subject. Shot the picture of your subjects from different angle with different poses. Also, plan before hand how you will capture the most important people of the day especially bride and groom. Also, try to cover some natural poses and never miss out to capture special moments of the day. Also, cover the location and choose a happy background with dark colour and a beautiful decoration to shot the pictures of bride and groom. Try to capture emotions in your photography.
Also, use two cameras for the day and make sure that both the cameras have different lens. Moreover, always keep your back-up that is extra equipment with you so that if in case there is problem in your camera you have another one. When taking group photo at the time of shooting wedding photography try to give the people your pose and make sure you focus on each and everybody in the group. Be creative enough to give unique and innovative poses in your group photography.

Read More......

Halong Bay Shoot

  • What should photographers be thinking about as they make plans for Halong Bay?
If you're going specifically for photography, you have to go at the best time of the year. Go for the optimal amount of good light. The second thing is a wide angle lens. You want as much of the beautiful bay at the right time as you can. Whether you are at water level, or on a hill looking down, the whole point is to get the wide shot to show vastness.
  • What else would you recommend before traveling to the bay?
Read up on the stories, the legends, the history. This will give you inspiration. As you appreciate how others, from a perspective of history or legends, see the bay, you'll then have some impressions to go for in your pictures.
  • Except that in Halong Bay so many of the stories are about dragons. No one's going to get to capture dragons.
No, but you may get mist and early morning light that's very soft, or afternoons where you get that long light late in the day. With the right kind of weather, and the lovely limestone, you're going to get the ambiance of an East Asian fairy tale. That's where your dragons come in.

Read More......

Natural Ligthing

Many things can make your photos look professional in photography. As photography lights are only one part of creating a print professional. Photography needs a few understanding and planning of some techniques and good photography lighting equipment too. Without the proper lights help to cover the subject or object, you can not to deliver the best shot for your audiences. Here are a few best tips for photography lights which you can practice them.
A photographer has to understand the sun's color scale. Photographs make some viewer towards certain feelings, regularly warmer colors bring to mind more passion in photography lights. Thus to get the right time of the day you have to understand the suns affect on the colors. The suns evoke neutral colors in the noon hours, when closer to afternoon you will have redder color.
You should work with the angle and direction of the sunlight while exploiting natural light.  The subjects or objects which are directly behind the sun will get too much light that means overexposure in photography lights. You will get softer shadows if the sunlight is wide and diffused while the more shadow you can make if the more narrow the light is focused. That is the way shadow is used, if used properly the shadow is able to give you more quality to the pictures.

Read More......

The Histogram


While reviewing images on the rear screen of your camera can sometimes be enough to assess whether the exposure is correct or not, it should only be used as a rough guide-surrounding lighting conditions can distort what you seen on screen, and on bright days, can make it hard to see the screen at all.
The best way to check exposure when you're reviewing your images is to review the histogram for the image. The histogram is a graphical interpretation of the image, showing the spread of tones - the left hand side showing the darkest areas, while the right hand side shows the light areas.
There's no such thing as a good or a bad histogram - it simply shows you the tonal range of the image. A well - exposed image will have peaks that are evenly distributed across the image, while overexposed shot will have the graph clumped over to the right - hand side, with the opposite being the case for an underexposed shot.

Read More......

3 Options Modern DSLR cameras

Photography is all about light. If you expose your sensor to too much light, you’ll bleach out the image; whereas not letting enough light on to the sensor will result in the photo being too dark-and in both cases, critical detail and colour be lost.

Multi Segment Matering
"Multi Segment"
Multi Segment or Multi Zone matering as it’s otherwise known, is the most recent addition to range of matering options available and is the default setting on most cameras. Each manufacturer has their own specific name for it. Canon call theirs Evaluative for instance, while Nikon terms theirs as Matrix matering, but in essence, they all operate in a similar way.
The entire image is metered, but is divided up to sections to produce a much more accurate reading for the scence as each segment takes its own reading. It’s so clever, that it knows which areas to give prominence to and which areas of the image to ignore-bright skies,for instance, that could fool a meter normally. Information from all segments is then combined and cross-checked woith database in order to determine the best exposure possible.

Read More......

ISO in Photograph

iso sample
In photography an ISO also get an important role in making an object image. Within the meaning of the ISO plays a role in regulating light into the lens.
ISO is one of the important settings that you can manipulate in your camera. Understand how the ISO works in digital photography can save you from a variety of difficult low-light situations, which are mainly used for this setting.
ISO the term is used widely since the day on which the popular film camera. These days, ISO refers to film speed or how a film is sensitive to light. Films generally come in a variety of ISO speeds, and photographers can exchange films with different film speeds to achieve the desired effect. However, in today's digital world, this process has been simplified as we can adjust the ISO setting just a few clicks on our camera settings menu. Today, like most digital cameras now and do not require film, we usually refer to the ISO as how sensitive the image sensor is to light.

Read More......

Bulb mode

bulb mode
Sometimes there are confused when they want to take pictures like the picture above. Seeing the light that long without the dashed make a question whether it should run to take it. There is a setting in Manual mode (M) at each camera DSLR in general. It's nice if could make a unique and valuable objects of art that extreme. I want to share a bit about the making of images Bulb mode. Hope this helps all readers:

Steps:

     * Provide a fairly sturdy tripod, try made of metal and strong enough to sustain your camera (pocket digital cameras are usually lighter than the SLR).

Read More......

Shutter Speed

Shutter speed is also called Shutter speed or closing speed. In terms of photography is a curtain that covers the camera's exposure sensor surface or on the surface of the film or image sensor. If the curtain is open there will be catching images At first the shutter is made of sheet metal, but most modern cameras use a cover made from fabric faster shutter speeds. Coverings made of fabric has a strength of about 50,000 to 200,000 times the open-close (conduct exposure). Cloth cover a worn or damaged can easily be changed in after-sales service center camera brand in question. to reduce the weight of the camera and to obtain The length of the curtain is open is determined by the camera's shutter speed setting. Digital photography allows us to understand the world of photography, shots can be reviewed directly via the LCD window, so that we can evaluate the shots, because of technical data related to the shots which had been seen and recorded, in contrast to conventional photography, where we have to print them first and can see , to review and evaluate the results jeperetan, its technical data we also have to record it first, so it takes a lot of cost and needless time wasted to be able to improve our photography skills

Read More......

Most appropriate settings for Exposure

exposure
In about 1950, the concept of en: exposure values ​​developed in Germany to simplify measurement of light falling onto the focal plane by removing the lens parameters to define the absolute values ​​into relative exposure.
To help photographers get the most appropriate settings for Exposure, used lightmeter. Lightmeter, which usually already exist in the camera, will measure the intensity of light entering the camera. In order to get normal Exposure.
Exposure is a term in photography that refers to the amount of light that falls into the medium (film or image sensor) in the process of capturing images.
There are also some things that can affect the level of exposure that is the type and intensity of the light source, the response object with ambient light, camera distance with the object rule, shutter speed, aperture, iso / asa film, and of course filters.

Read More......
Template by : Kendhin x-template.blogspot.com